
Chicken Kiev is a dish that promises a burst of flavors. Imagine cutting into a crispy, golden-breaded chicken breast to find a delicious, melted garlic butter center that flows out. Traditionally deep-fried, this dish can be quite indulgent. But what if you could enjoy the same taste and texture with a fraction of the oil? Enter the Air Fryer. In this article, we will show you how to make Air Fryer Chicken Kiev that’s crispy on the outside, juicy on the inside, and loaded with flavor.
Whether you’re new to using an air fryer or a seasoned pro, this recipe will make you fall in love with this classic dish all over again. Let’s dive in!
What is Chicken Kiev?
Chicken Kiev is a traditional dish of breaded chicken stuffed with a flavorful garlic butter filling. Originally thought to be from Ukraine, it gained popularity around the world due to its rich taste and satisfying texture. The dish involves rolling chicken breasts around a garlic butter mixture, coating them in breadcrumbs, and frying them until crispy. It’s a classic comfort food that has found its place in many households.
Why Use an Air Fryer?
Table of Contents
Why opt for the air fryer when you can fry it the old-fashioned way? The answer is simple: health and convenience. Air fryers use hot air circulation to cook food, requiring only a minimal amount of oil. This means you get that crispy texture without the excess oil and calories. Plus, air fryers are quicker and less messy than traditional frying methods, making cleanup a breeze. Imagine getting all the deliciousness of Chicken Kiev without the guilt!
Ingredients for Air Fryer Chicken Kiev
Here are the ingredients you’ll need to make this delicious dish:
- Chicken Breasts: 4 pieces, pounded flat
- Unsalted Butter: 1/2 cup, softened
- Garlic: 3 cloves, minced
- Fresh Parsley: 2 tablespoons, finely chopped
- Salt and Pepper: To taste
- Eggs: 2, beaten
- All-Purpose Flour: 1/2 cup
- Breadcrumbs: 1 cup (Panko works best for extra crispiness)
- Olive Oil Spray: For greasing
How to Prepare the Garlic Herb Butter
The secret to a great Chicken Kiev lies in the garlic herb butter filling. Here’s how to make it:
- In a bowl, mix the softened butter, minced garlic, and chopped parsley.
- Add a pinch of salt and pepper to taste.
- Roll the mixture into a log using plastic wrap and freeze it for at least 30 minutes. This helps keep the butter firm when stuffing the chicken.
Step-by-Step Guide to Making Air Fryer Chicken Kiev
Step 1: Flatten the Chicken Breasts
- Place the chicken breasts between two pieces of plastic wrap.
- Use a meat mallet to pound them to an even thickness, approximately 1/2 inch.
Step 2: Add the Butter Filling
- Slice the chilled garlic herb butter into small pieces.
- Place a piece of butter in the center of each flattened chicken breast.
- Roll the chicken around the butter, tucking in the sides to seal it completely.
Step 3: Coat the Chicken
- Dip each rolled chicken breast in flour, then the beaten eggs, and finally in breadcrumbs.
- Make sure the chicken is thoroughly coated for a crispy crust.
Step 4: Preheat the Air Fryer
- Preheat your air fryer to 375°F (190°C) for about 5 minutes.
- Lightly spray the basket with olive oil spray.
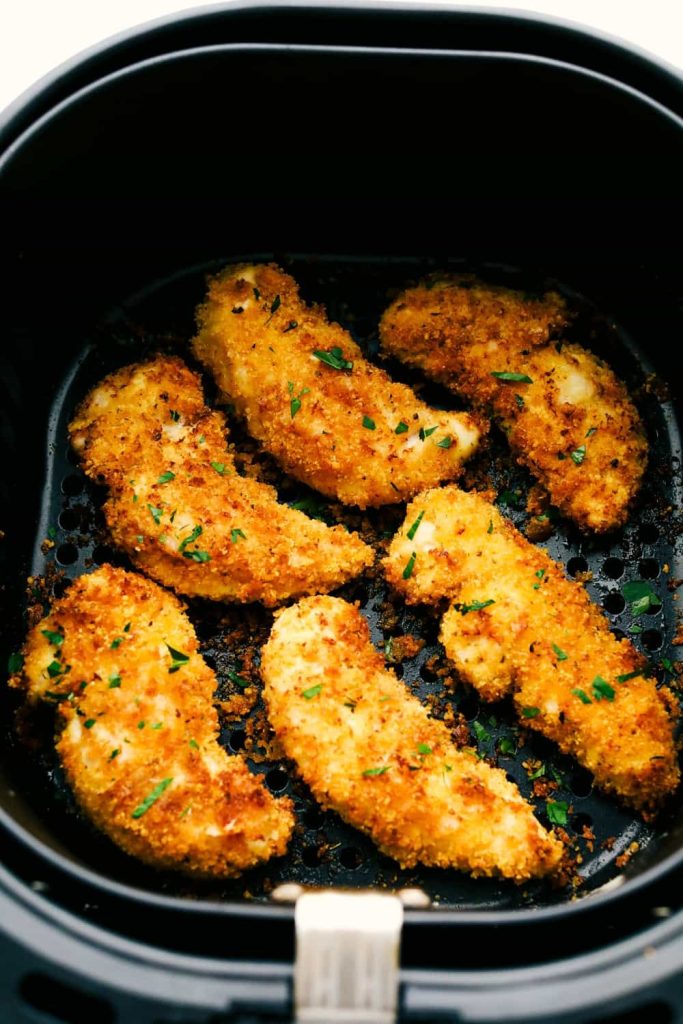
Step 5: Cook the Chicken
- Place the breaded chicken breasts in the air fryer basket, ensuring they don’t touch.
- Spray the top with a little olive oil for added crispiness.
- Cook for 18-20 minutes, turning halfway, until golden brown and cooked through.
Tips for Perfect Air Fryer Chicken Kiev
- Freeze the Butter: Ensure the garlic herb butter is firm before stuffing to prevent it from leaking out during cooking.
- Pound Evenly: Flatten the chicken breasts to an even thickness for uniform cooking.
- Use Panko Breadcrumbs: These breadcrumbs will give your Chicken Kiev a crispier texture.
Common Mistakes to Avoid
- Overcrowding the Air Fryer: Cook the chicken in batches if necessary to allow air to circulate properly.
- Not Sealing the Chicken Properly: This can lead to the butter leaking out. Ensure the sides are tucked in securely.
- Skipping the Preheat: Preheating the air fryer ensures even cooking and a nice, crispy coating.
Serving Suggestions
Serve your Air Fryer Chicken Kiev with a side of creamy mashed potatoes, steamed vegetables, or a fresh garden salad. A squeeze of lemon over the top adds a burst of freshness.
How to Store and Reheat
Storing:
- Place leftover Chicken Kiev in an airtight container and refrigerate for up to 3 days.
Reheating:
- Reheat in the air fryer at 350°F (175°C) for 5-6 minutes until warm and crispy.
Health Benefits of Using an Air Fryer
Air frying significantly reduces the amount of oil needed compared to traditional frying, making it a healthier cooking method. It also helps retain the nutrients in the food, making your meals not only delicious but also better for you.
Conclusion
Air Fryer Chicken Kiev is a delightful twist on a classic dish, offering the same mouth-watering flavors with less guilt. The air fryer makes it easier, quicker, and healthier to enjoy this beloved recipe without compromising on taste. So, give it a try and bring a touch of gourmet cooking to your home.
FAQs
1. Can I use frozen chicken breasts for this recipe?
Yes, but make sure to thaw them completely before pounding and stuffing.
2. How do I prevent the butter from leaking out?
Ensure the butter is well-chilled, and the chicken is tightly sealed around it.
3. Can I make this recipe gluten-free?
Yes, substitute all-purpose flour and breadcrumbs with gluten-free alternatives.
4. How can I make this dish spicier?
Add some chili flakes or cayenne pepper to the garlic herb butter or the breadcrumb coating.
5. Can I prepare this in advance?
Yes, you can assemble the chicken and freeze it. Just air fry directly from frozen, adding a few extra minutes to the cooking time.